The Panacea 2 is a free-standing, outer-pitch first, 3-season tent that offers plenty of space and two porches. Read the Panacea 2 tent pitching instructions below:
- Unpack the tent and lay out flysheet and inner. (Note: The inner tent is already attached to the inside of the flysheet).
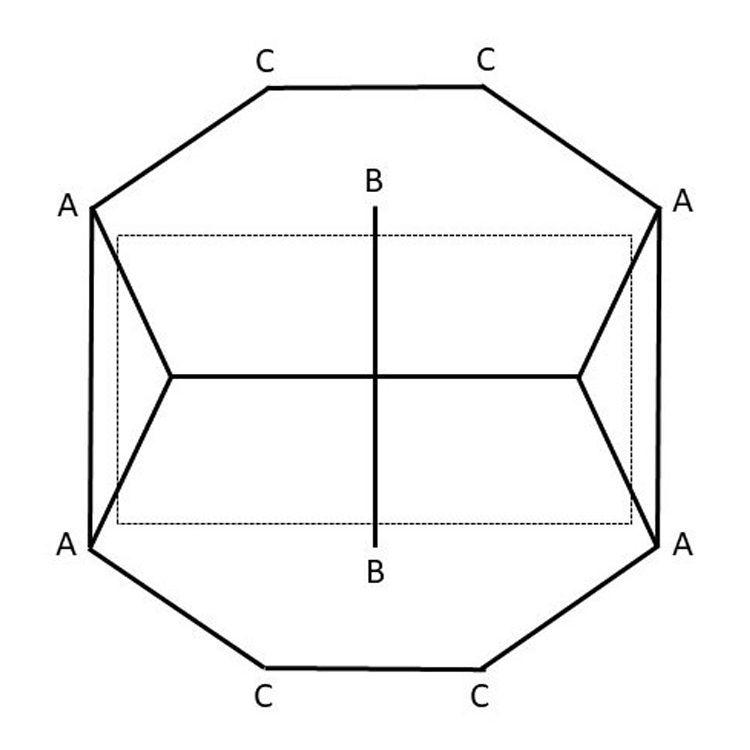
- Carefully assemble the one piece alloy pole ensuring that all joints are fully connected and the centre cross pole is above the main pole and at 90 degrees to it.
- Insert each pole-end from the main part of the pole into the corresponding eyelet tab on the hem of the flysheet – A
- Attach the pole clips that are on the flysheet on to the main pole and end sections.
- Insert the cross piece pole-ends into the eyelets located above each door on the flysheet – B
- Peg out in the following order:-
- a) The four corners of the flysheet where the poles are located in the eyelets – A
- b) The four porch pegging points – C
- c) The remaining flysheet elastics plus guy lines.
NOTE: When using trekking poles for extra stability, the handle end must be tucked into the flysheet pocket, with the pointed end in the ground.
The Wild Country Panacea 2 is supplied with:
- 1 piece alloy pole
- 14 x alloy pegs