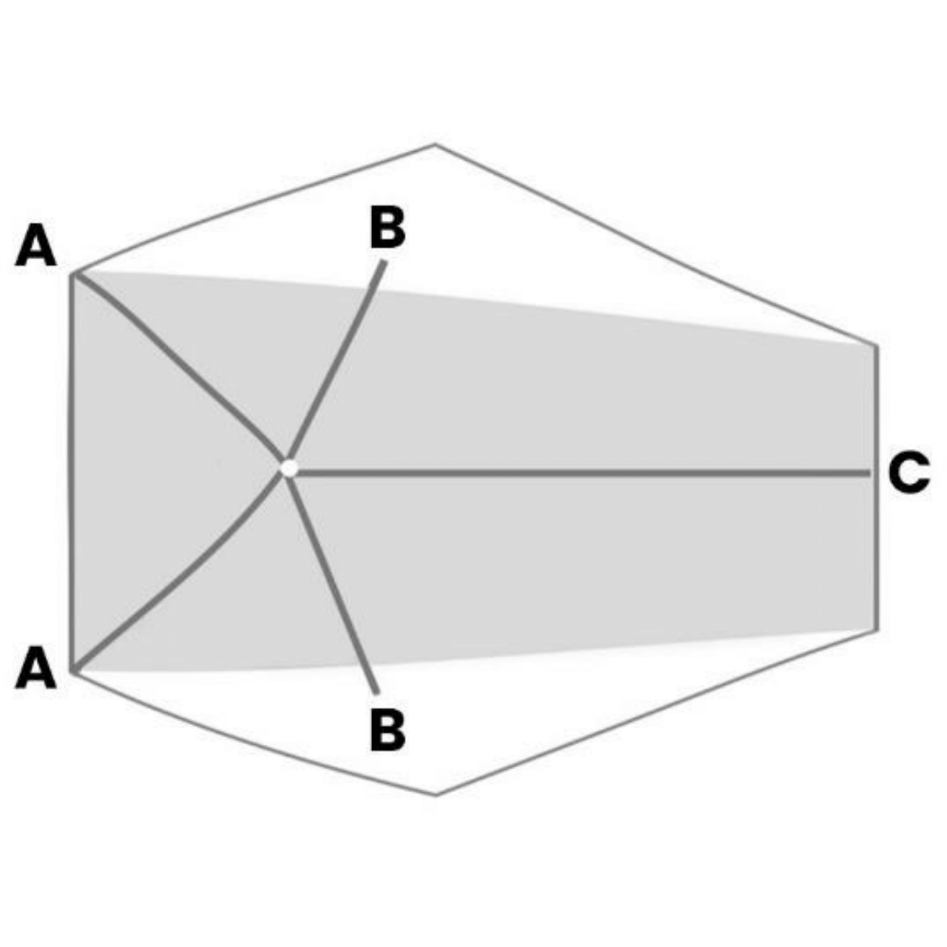
- -Unpack the tent and lay out the inner with the
orange hooks uppermost. - Carefully assemble the one-piece alloy pole
ensuring that all joints are fully connected. Ensure
the short pole B-B crosses over the main pole. - Insert each pole-end from the main part of the
pole into the corresponding silver eyelets on the
inner tent corners — A.
4, Attach the orange pole clips from the inner tent on
to the main pole. - Insert the cross-piece pole-ends into the silver
eyelets located above each inner tent door — B. - Place the flysheet over the inner tent and secure it
to the pole set by using the cross-pole protection
pockets at — B. - Attach the eyelets at the flysheet corners under
the pole feet at the inner tent corners and adjust
tension — A. TO further secure the flysheet to the pole
set, use the x4 velco tapes on the underside of the
flysheet to attach to the pole. - Peg out points — A with the x4 5.6g alloy pegs and
use the XIO 9g Terra Firma Mini pegs for all other
points of the tent. - TO use trekking poles for extra Stability in windy
conditions with the velcro Straps provided: Use the
velcro straps at B— B on the inner and attach to the
handle of the trekking pole. Raise the height of the
trekking pole until if offers the tent more stability,
Please see website for more details.