Let’s face it, no one wants a leaky tent, especially when you have spent all day daydreaming about chilling out in the sanctuary that is your tent; the last thing you want is for rain to be sneaking through the seams! If your tent has leaked in the past, chances are it needs some seam sealant.
Seam sealing is a great way to ensure your tent is fully waterproof and prevents any potential leaks. Better yet, you can do it from home! But how exactly do you seam seal a tent? And is it always necessary to do so? In this blog, we will help you decide whether or not you need to seam seal your tent, how to identify potential leaks, and how to successfully seam seal your tent.
Seam Sealing vs Seam Taping
Seam sealing and seam taping ultimately do the same thing; seal the seams of a tent to offer greater waterproofing. However, there are reasons to choose one over the other and it all comes down to the fabric of your tent.
Silicone/silicone tents cannot be factory seam taped due to the slippery surface of the fabric, which is why it is always recommended to seam seal your tent. Our Silicone/Silicone tents such as the Laser Compact series now come with a factory silicone-sealed main seam, which means you won’t need to seam seal your tent. However, other tent manufacturers don’t offer this, so you’ll need to seam-seal your tent before you head to the hills.
Seam sealing involves applying a layer of sealant to the interior and/or exterior seams of your tent to create a waterproof barrier. We apply a sealant to the seams as this is the most vulnerable part of a tent due to the stitching, ultimately benefiting from the extra waterproofing.
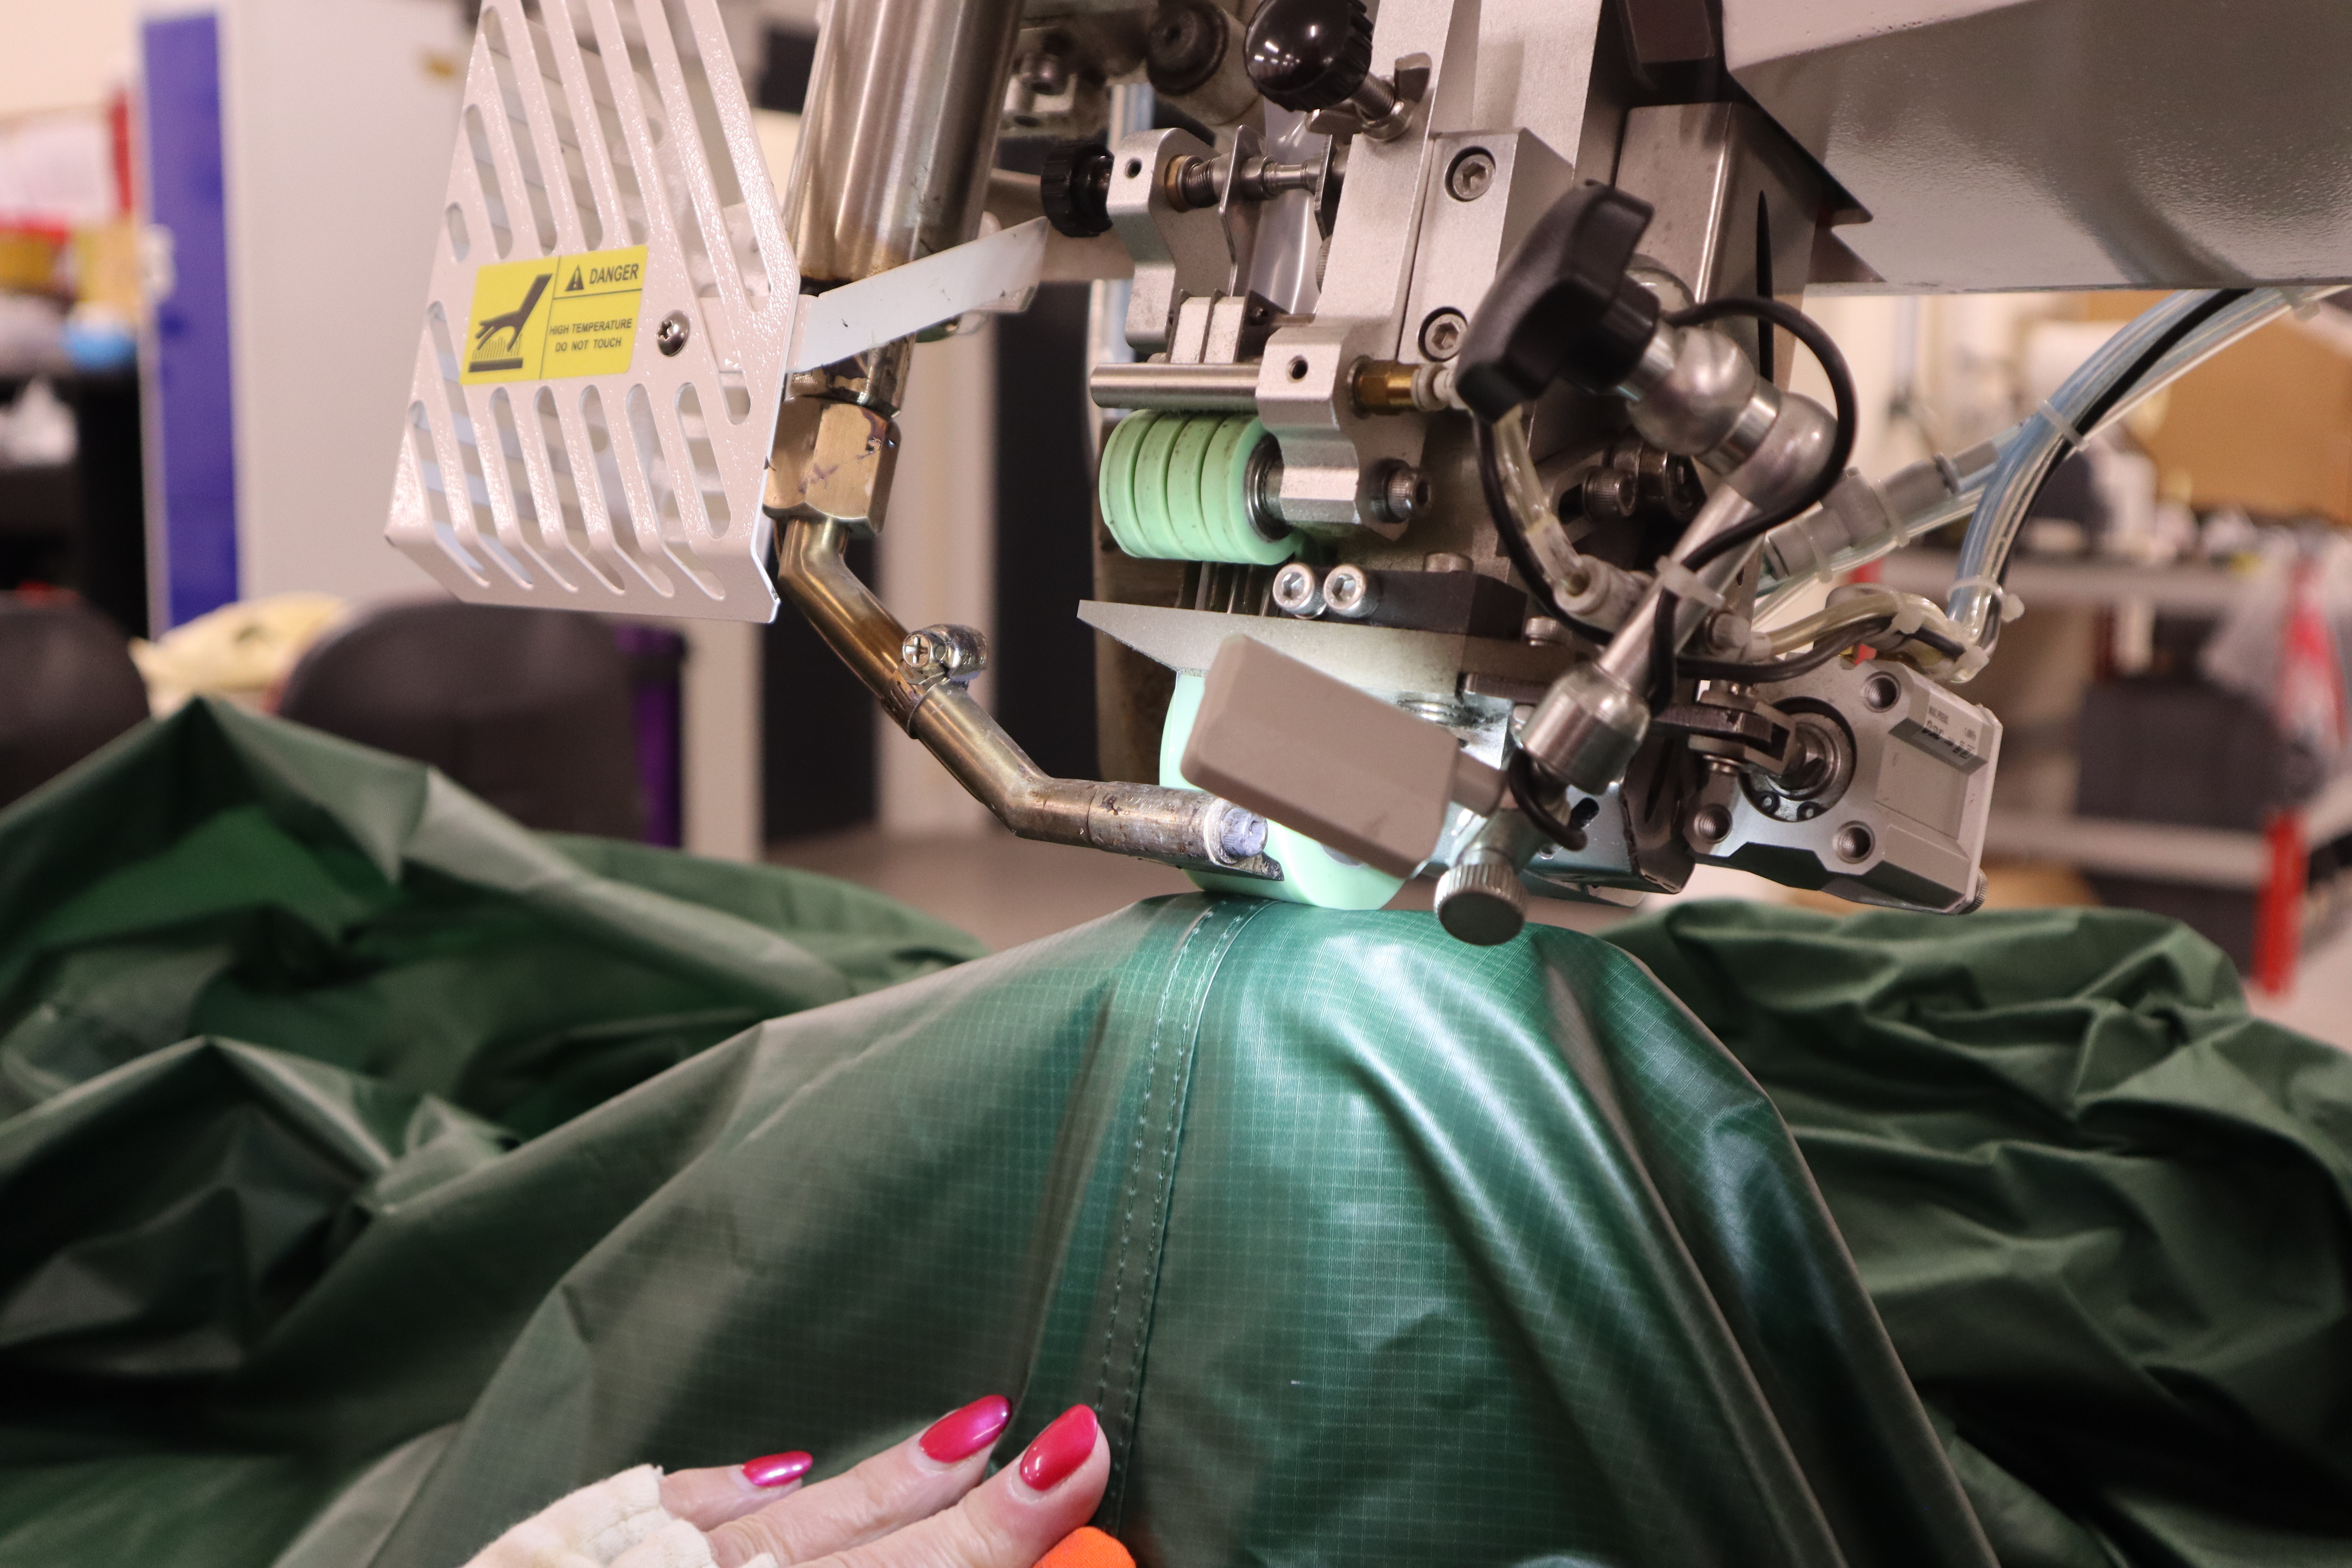
However, every tent is different and tents made from Silicone/PU will usually already have been seam-taped at the manufacturing stage. The seam-taping process involves applying a layer of tape to the seams to provide waterproof protection; this is applied by specialist machinery and cannot be done at home.
Seam taping machinery in our factory
Tent seams after being taped
If your tent is seam taped by the manufacturer, you can hit the hills confidently knowing your tent is waterproof. However, over time, seam tape can tear, flake, and degrade from exposure to UV rays, compromising its effectiveness in keeping you dry. If you notice your seam taping looking damaged, get in touch with us for a free quote to re-tape your tent back to its former glory.
How to seam seal your tent
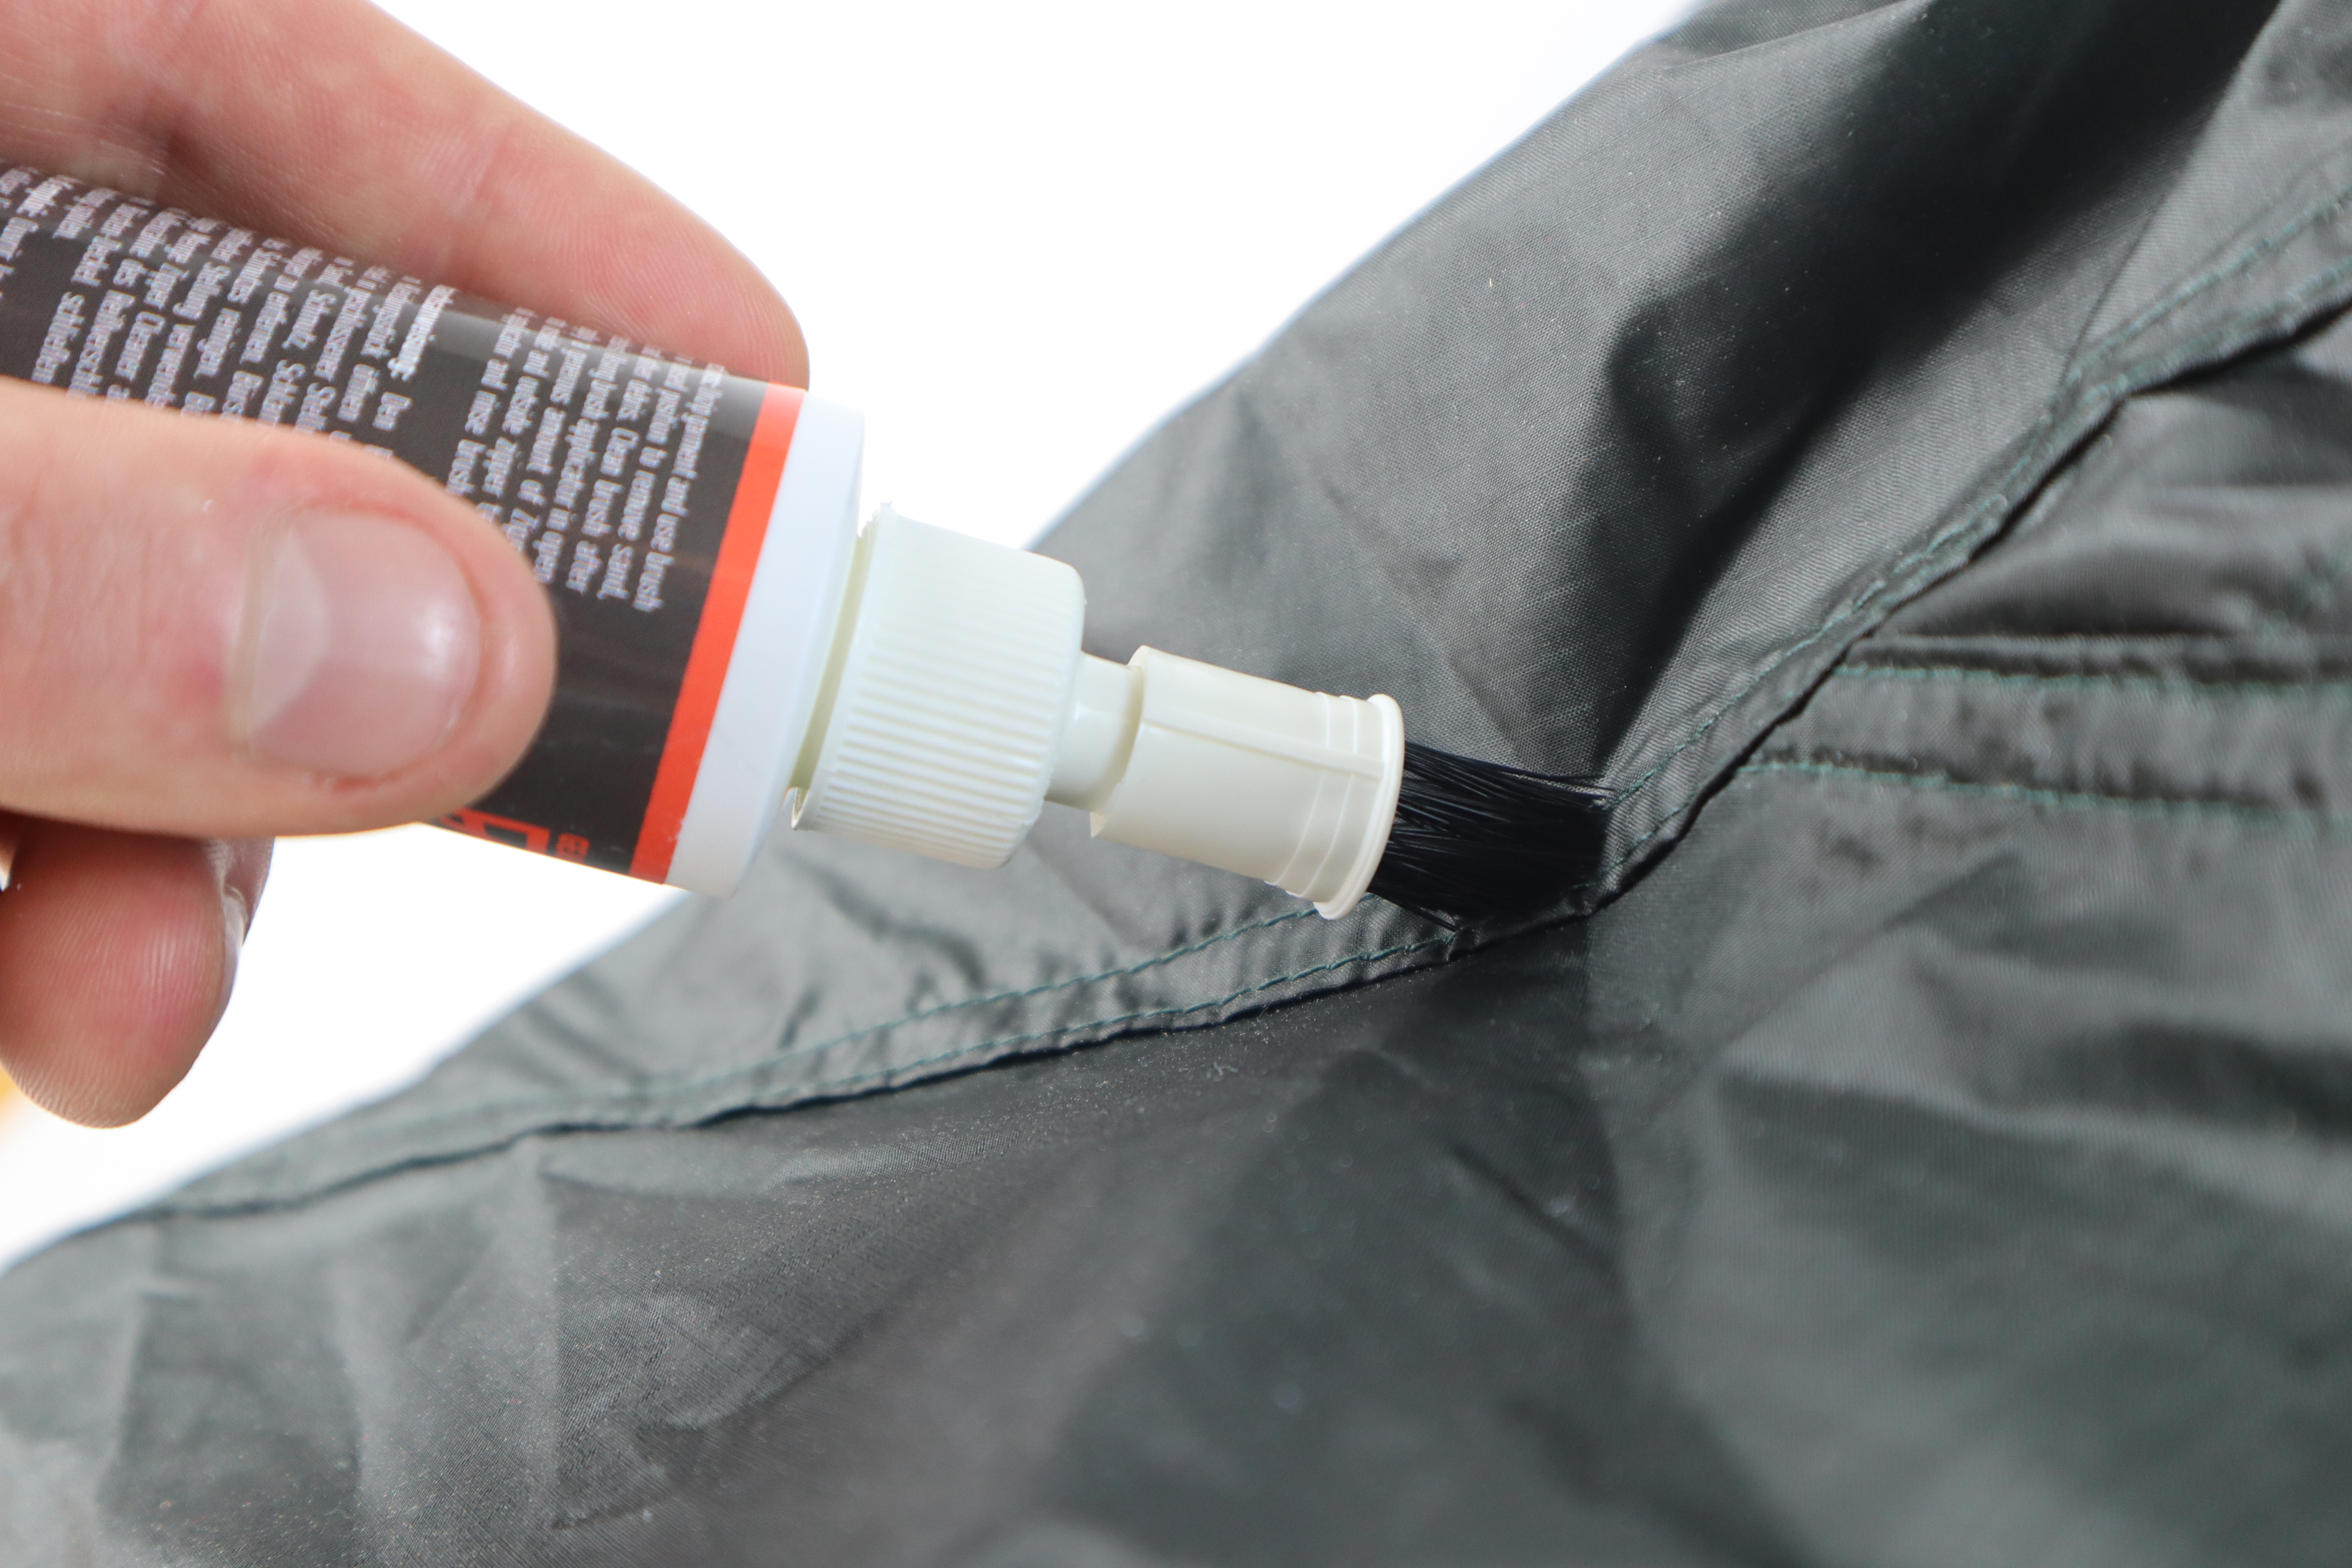
Seam sealant is like applying a layer of glue to create a watertight seal. Before you begin, there are a few things to consider to make sure you seal the tent correctly:
Dry environment – we know we are in the UK but try to pick a day where it isn’t raining, or if you can, do it inside!
Remove old seam tape (if necessary) as this can interfere with the sealant.
Give your tent a good clean so there is no dirt or grime around the seams.
Masking tape (put tape over your tent’s zip and mesh to avoid getting sealant on those areas as it can damage zips)
Small brush
STEP 1: Pitch your tent. Make sure it is completely dry and clean.
STEP 2: Apply a layer of sealant to the interior seams working from the corners upwards.
STEP 3: Use the brush to distribute the sealant evenly on the seams.
STEP 4: Leave it to dry! Leave your tent at least 6 hours/overnight to ensure the sealant is cured.
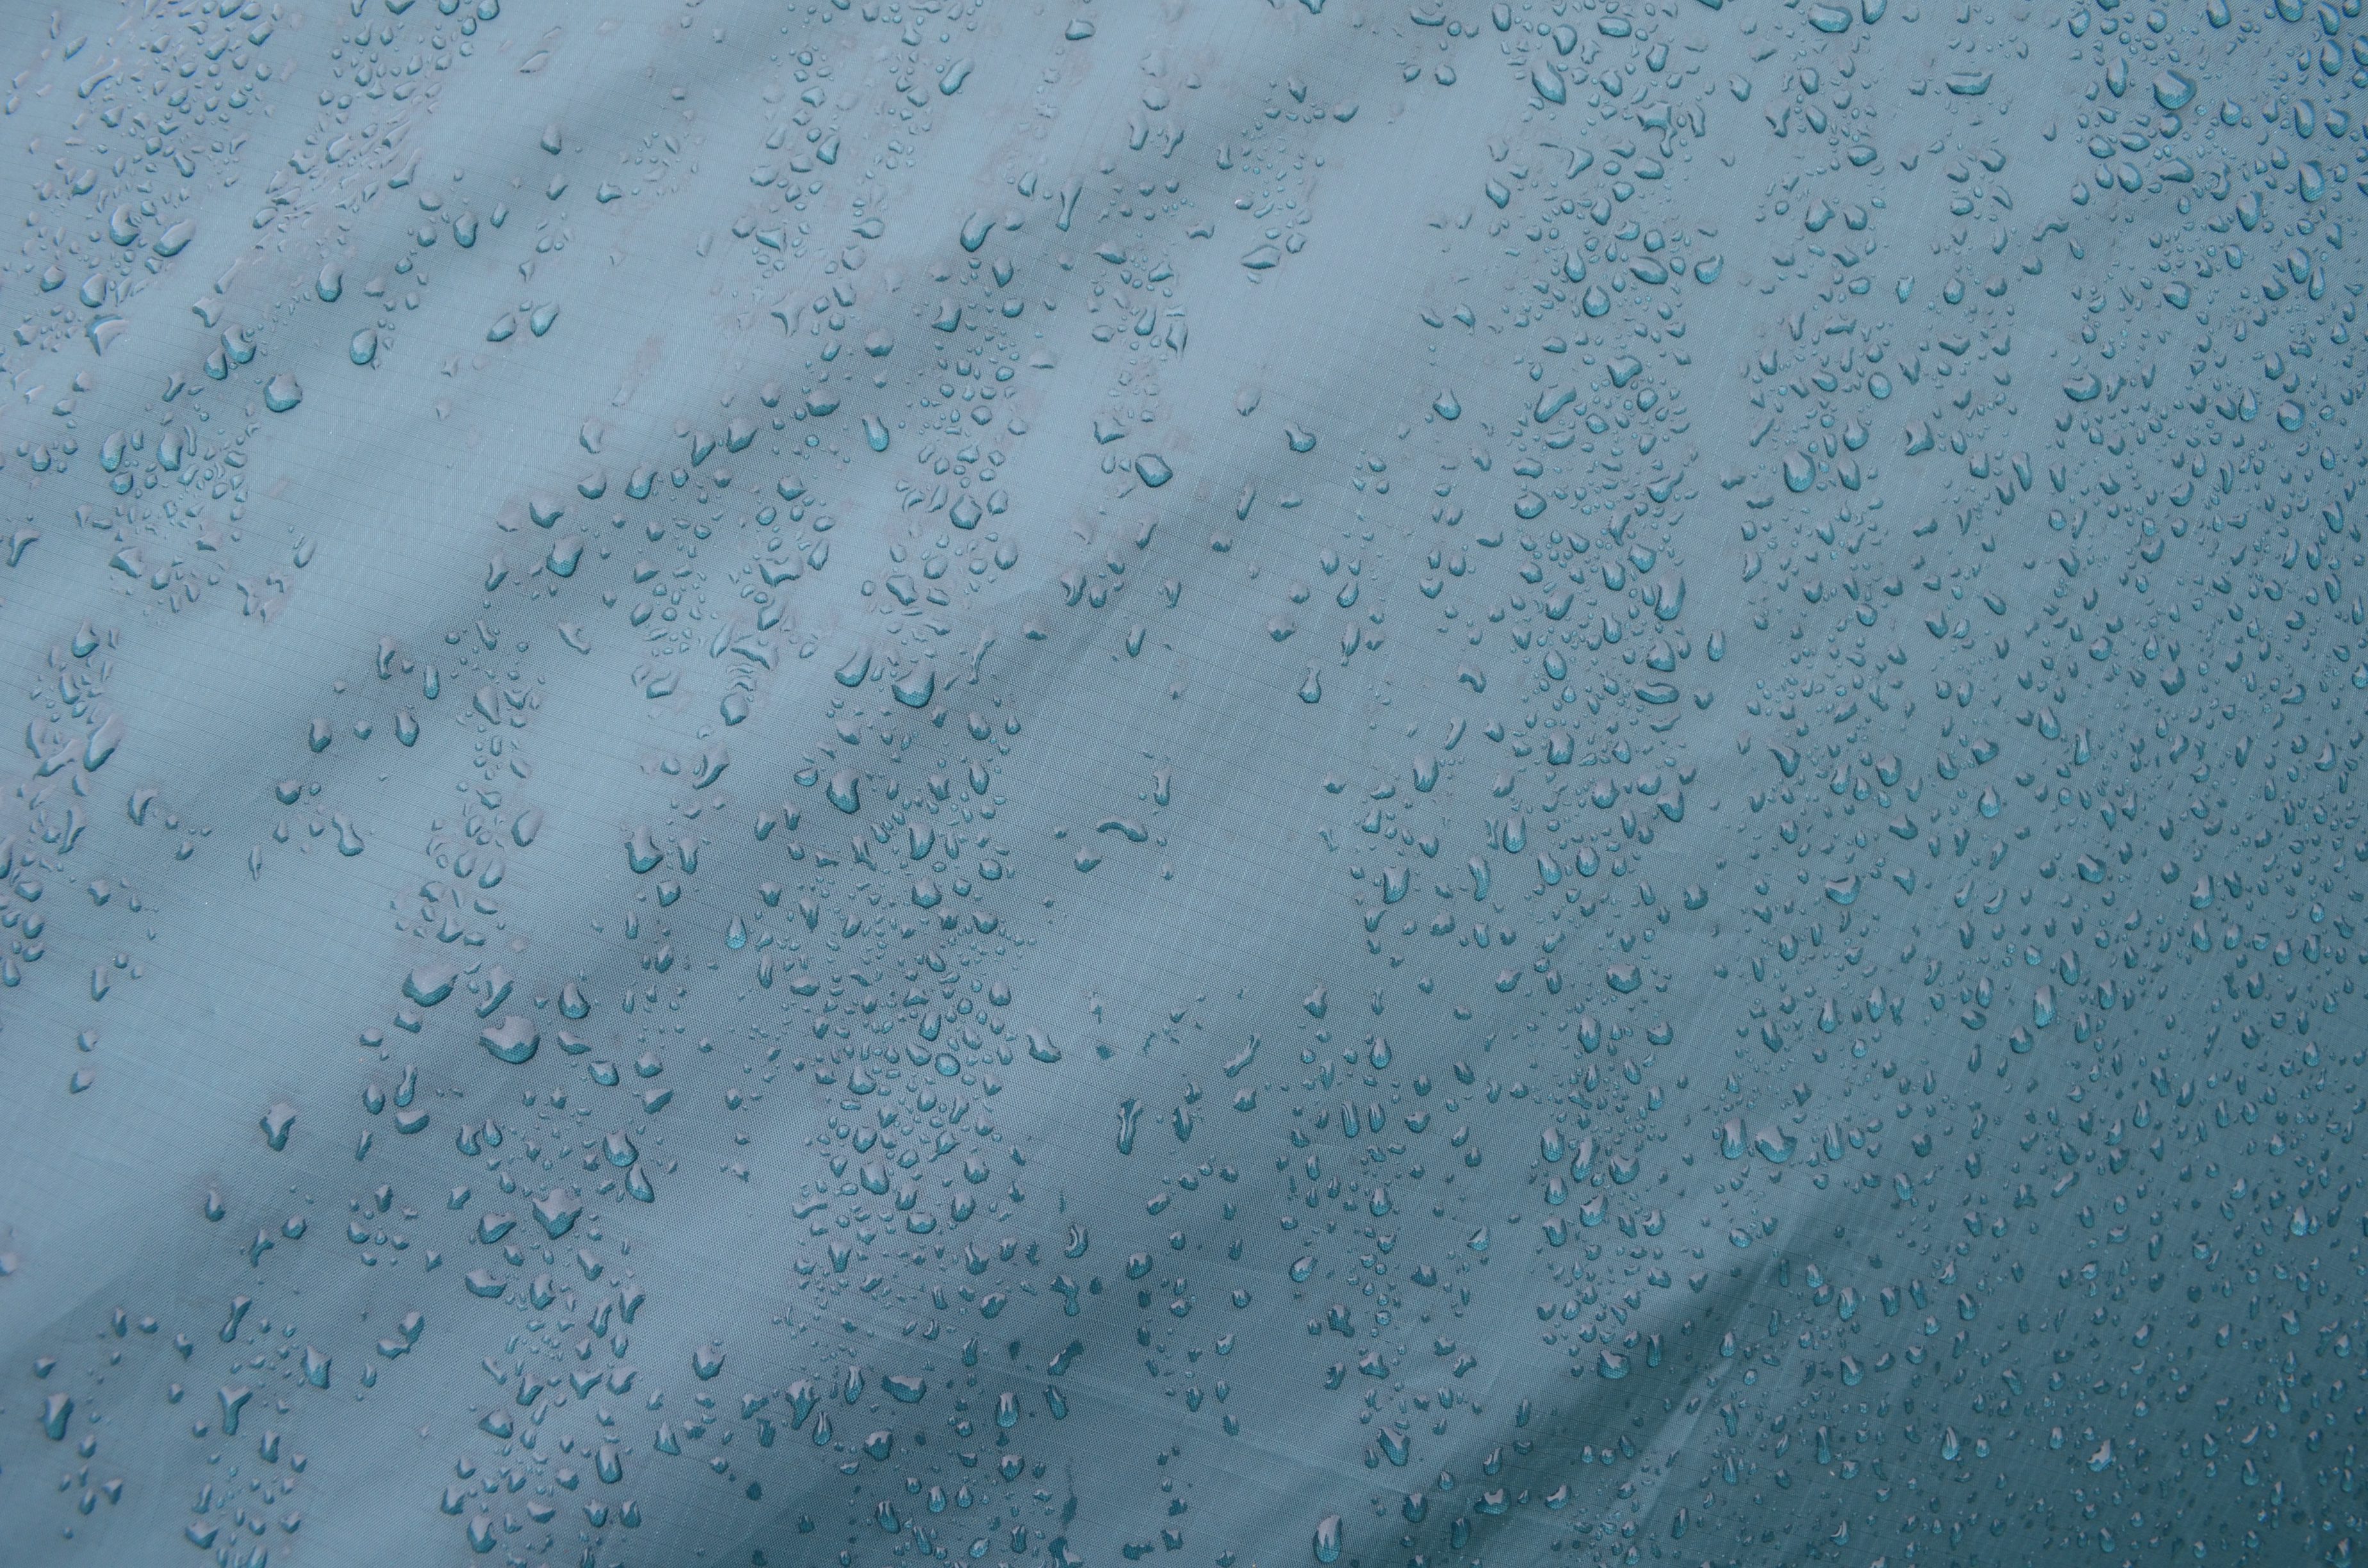
STEP 5: Test for leaks! Using a hose, cover your tent in water and check your sealant has worked. If water is getting through the seams, dry your tent and apply more sealant to that area.
This website uses cookies so that we can provide you with the best user experience possible. Cookie information is stored in your browser and performs functions such as recognising you when you return to our website and helping our team to understand which sections of the website you find most interesting and useful.
Strictly Necessary Cookies
Strictly Necessary Cookie should be enabled at all times so that we can save your preferences for cookie settings.
If you disable this cookie, we will not be able to save your preferences. This means that every time you visit this website you will need to enable or disable cookies again.
3rd Party Cookies
This website uses Google Analytics to collect anonymous information such as the number of visitors to the site, and the most popular pages.
Keeping this cookie enabled helps us to improve our website.
Please enable Strictly Necessary Cookies first so that we can save your preferences!